You're about to transform your holiday décor into a whimsical celebration of everyone's favorite green grouch. Whether you're a seasoned crafter or just starting out, these 25 Grinchmas DIY projects will help you create a magical Who-ville atmosphere that'll make even the Grinch's heart grow three sizes. From hand-painted mason jars glowing with emerald charm to a miniature village that captures Seuss's fantastical world, each project offers a unique way to blend classic Christmas elements with that distinctive Grinch flair. Let's discover how you can turn your home into a festive haven that'll have neighbors wondering what's cooking in Mount Crumpit.
Grinch Hand-Painted Mason Jars
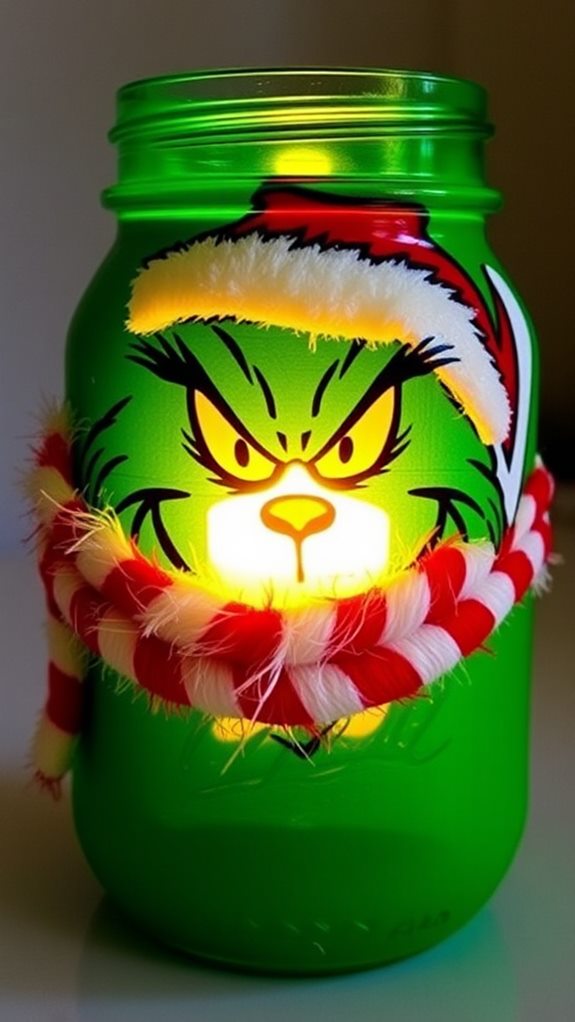
Transform plain mason jars into whimsical Grinch-themed holiday decorations with just a few basic supplies. You'll need clean mason jars, green acrylic paint, black and red paint for details, and clear sealant.
Start by painting the entire jar green, applying two thin coats for even coverage. Once dry, paint a black oval for the Grinch's eye and add his signature mischievous expression using simple brush strokes. Create his iconic devious smile in black, extending it around the jar's curve. Add a small red heart on one side – make it tiny, since his heart was "two sizes too small."
These grinch jar crafts come alive with festive paint techniques like dry brushing for texture or adding white highlights for dimension. Seal your creation with a clear coat to protect the design, then add battery-operated tea lights for a magical glow.
Who-ville Miniature Christmas Village

Create a whimsical Who-ville village centerpiece using affordable craft supplies and recyclable materials from around your home. Start with empty cardboard boxes and paper towel rolls as the base for your curved, crooked buildings. Cover them with white craft paper and add colorful details using acrylic paint and markers.
Fashion wonky windows, twisted doorways, and curvy rooflines that capture the essence of Who-ville traditions. Use polymer clay to craft tiny Who residents and miniature decorations. Create snow-covered pathways using cotton batting and glitter. Don't forget to include a spot for displaying Grinch holiday recipes on tiny recipe cards near a miniature Who-ville bakery.
Add battery-operated LED lights inside the buildings for a magical glow. Position your village on a foam board base covered with fake snow and green garland trim.
Fuzzy Green Grinch Wreath

While traditional wreaths bring holiday cheer, a fuzzy green Grinch wreath adds a playful twist to your door decor. Start with an 18-inch wire wreath form and wrap it completely with fuzzy wreath materials like lime green feather boas or furry yarn – you'll need about three boas or four skeins of yarn.
For Grinch wreath embellishments, attach a large red heart ornament off-center using floral wire – this represents the Grinch's growing heart. Add black felt or foam circles for eyes, and create his signature smirk using curved black pipe cleaners. Don't forget his arched eyebrows made from black felt. Complete the look with a small Santa hat tilted to one side and secure all elements with hot glue. You'll spend under $25 using craft store supplies.
Max's Antler Headband Craft

Max's lovable headpiece from the Grinch story makes an adorable DIY accessory for under $10. You'll need a plain brown headband, brown pipe cleaners, and a small bell for this festive creation.
Start by twisting two pipe cleaners together to form each antler, creating natural-looking curves and bends. Secure the base of your handmade antlers to the headband using hot glue or strong craft adhesive. Wrap additional pipe cleaners around the connection points for extra stability. Add small branches to your main antlers by twisting shorter pieces onto the larger forms. Finish by attaching a tiny bell to one antler, just like Max's original holiday headband.
For a more polished look, you can paint the pipe cleaners with brown acrylic paint to achieve a uniform color throughout the antlers.
Cindy Lou's Christmas Tree Ornaments

Just like the original movie's vibrant ornaments that adorned Cindy Lou Who's tree, you can craft whimsical decorations using simple Dollar Store supplies. Start with clear plastic ornament balls and fill them with pink, red, and white glitter to capture Cindy Lou's traditions. You'll need acrylic paint, ribbon, and small plastic candies to recreate Cindy Lou's favorites.
Paint polka dots on the outside of each ornament using bright Who-ville colors like hot pink and lime green. Add tiny candy cane stickers or miniature lollipop embellishments around the middle. Thread red and white striped ribbon through the tops, creating loops for hanging. Finally, seal each ornament with clear spray paint to keep the glitter from falling out. These budget-friendly decorations will transform your tree into a whimsical Who-ville masterpiece.
Grinch Face Door Cover
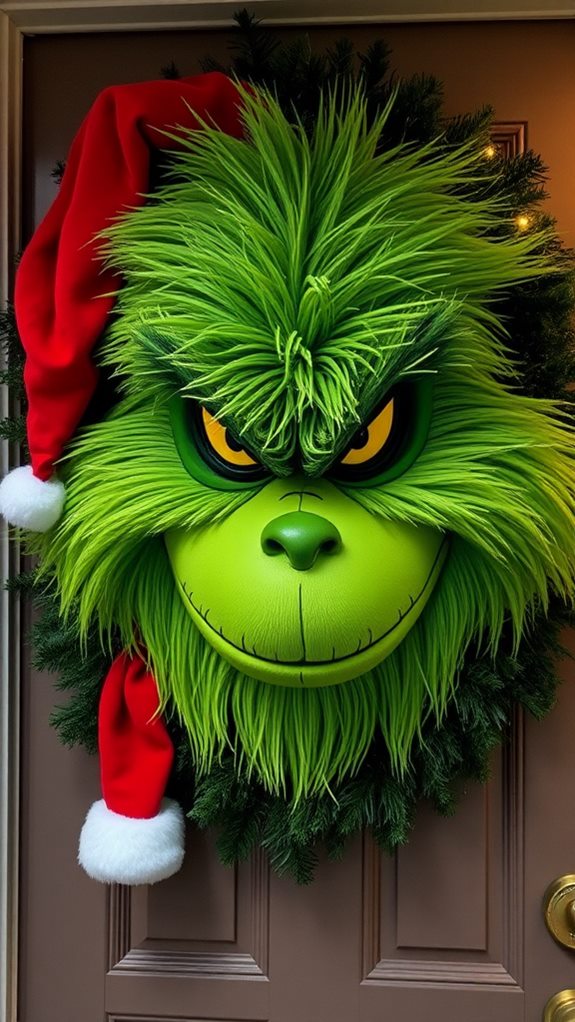
Transform your front door into a show-stopping Grinch face using green felt as the base material. Cut the felt to match your door's dimensions, then secure it with removable adhesive strips. Create the Grinch's distinctive features using black and white felt: oval eyes, arched eyebrows, and that infamous crooked smile. Add red felt for the inside of his mouth and pink for his nose.
Complete your door's transformation by installing a Grinch doorbell decoration that plays "You're a Mean One, Mr. Grinch" when pressed. Place a coordinating Grinch themed doormat below, featuring witty phrases like "Go Away" or "Bah Humbug." For extra detail, attach faux fur trim around the edges to mimic the Grinch's fuzzy face, and use battery-operated LED lights behind the eyes for a mischievous nighttime glow.
Who-ville Window Silhouettes
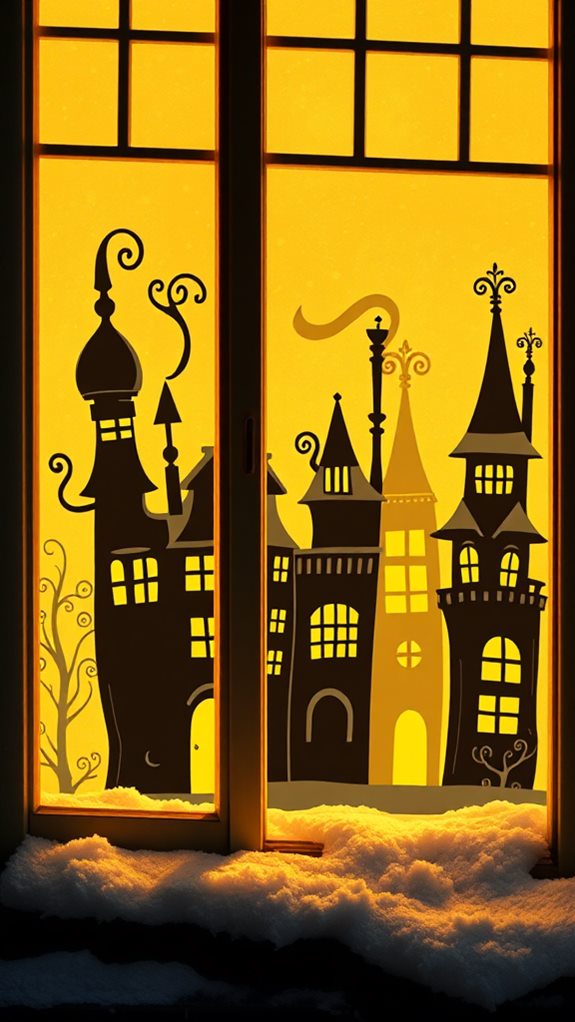
Create enchanting Who-ville window displays using black cardstock or construction paper to craft whimsical silhouettes. Draw and cut out iconic Who-ville buildings with their signature curved rooftops, crooked chimneys, and quirky architectural details. You'll need scissors, tape, and a pencil for tracing.
Start by measuring your windows and sizing your templates accordingly. Cut the buildings in various heights, making sure to include those distinctive Who ville traditions like hanging wreaths and curly decorations. For Grinch inspired crafts authenticity, add silhouettes of Who citizens with their round bodies and unique hairstyles. Secure the cutouts to your windows using removable tape or poster putty.
Backlight your display with warm white LED lights or battery-operated candles to create a magical glow that'll transform your windows into a festive Who-ville scene.
Green Furry Christmas Stockings

Grinchy stockings bring the beloved character's signature fur to your holiday mantel with a budget-friendly twist. You'll need green faux fur fabric, basic stocking templates, hot glue, and scissors to create these furry stocking ideas. Start by cutting two stocking shapes from the fur fabric, ensuring the fur's direction flows downward for authenticity.
Apply stocking decoration techniques by turning the pieces inside out and hot gluing the edges together, leaving the top open. Once dry, flip right-side-out and fluff the fur with a wide-toothed comb. Add a red felt cuff at the top, secured with hot glue. For extra Grinchy flair, stitch or glue small red hearts to the cuff's corner – they'll grow three sizes, just like in the story!
Heart-Growing Snow Globe

Magically capture the Grinch's heartwarming transformation with a DIY snow globe that features a growing heart mechanism. You'll need a large mason jar, glycerin, glitter, distilled water, a small Grinch figurine, and red craft foam for the heart.
Cut two identical heart shapes from the foam – one small and one triple the size. Attach the small heart to a thin, clear fishing line, and secure the larger heart behind the Grinch figure. Mount both on the jar's lid using waterproof adhesive. When you turn the globe, the small heart appears to grow as it rises, concealing the larger heart.
Fill the jar with water, add 2 tablespoons of glycerin and silver glitter for snow. Seal tightly with waterproof sealant. This snow globe crafting project creates unique holiday decor that'll impress without breaking your budget.
Grinch-Themed Throw Pillows

Cozy throw pillows featuring the Grinch's iconic expressions can transform any seating area into Whoville this holiday season. You'll need green and red felt, pillow forms, basic sewing supplies, and downloadable Grinch pillow patterns from craft websites.
Start by cutting your festive fabric choices to size, using a standard 18×18 inch square for each pillow face. Transfer your chosen Grinch pattern onto the green felt, then carefully cut out the facial features. Arrange and pin the pieces onto your base fabric, securing the Grinch's signature smirk or scowl. Stitch the face elements in place using a zigzag stitch. Once complete, sew your pillow front to back with right sides together, leaving a small opening to insert your pillow form. Hand-stitch the opening closed.
Who-ville Candy Cane Forest

A whimsical candy cane forest brings your indoor Who-ville scene to life with budget-friendly materials you'll find at any dollar store. Start by gathering plastic candy canes in various sizes, foam blocks, white spray paint, and colorful pipe cleaners.
Create your festive forest decorations by inserting candy canes into foam blocks at different heights and angles. Spray paint the foam bases white to resemble snow, then cover with iridescent glitter. Twist pipe cleaners around some candy canes to add Seussian curves and swoops. You'll want to cluster the candy canes in groups of three to five for visual impact.
For extra whimsy in your candy cane crafts, add small ornaments or bells to the curved tops. Arrange multiple foam blocks together to create a sprawling Who-ville forest display.
Grinch Christmas Tree Topper

Transform your Christmas tree's crown with an eye-catching Grinch tree topper that captures his signature scowl and green complexion. Start with a foam ball for the head, and paint it using the same green shade popular in Grinch costumes. Create his iconic furrowed expression using black felt or paint, and add yellow craft foam for those cynical eyes.
Cut red fleece fabric into a Santa hat shape, stuff it lightly, and attach it to the foam head. Add white faux fur trim around the hat's edge. For the final touch, create his curled smile using black pipe cleaner. Secure the topper to your tree using a sturdy wire frame – it's perfect for Grinch movie themed parties or any Who-ville inspired holiday display. Don't forget to fluff the hat occasionally to maintain its perky appearance.
Who-Hash Table Centerpiece

Create a showstopping Who-hash centerpiece using three budget-friendly tiers of colorful sweets and Seussian decor. Start with three cake stands or plates of varying heights, securing them with sturdy candlesticks or decorative pillars. For authentic Grinchmas traditions, fill each tier with color-coordinated candies like green and red M&Ms, striped candy canes, and swirled lollipops.
Add whimsical touches inspired by Who ville recipes: sprinkle powdered sugar "snow" over mint-green meringues, arrange twisted rainbow candy ribbons, and position red-and-white-striped paper straws at playful angles. Top the display with a miniature silver serving dish of actual Who-hash (mixed candies and treats). Complete your centerpiece with small ornaments in bright colors, curled ribbon, and tiny bottle brush trees scattered between the confections.
Mount Crumpit Snow Scene

Building your own Mount Crumpit snow scene starts with an inexpensive foam cone from the craft store as your mountain base. Cover the cone with white felt, securing it with hot glue in small sections to prevent wrinkles. Create rocky outcrops by pinching and folding the felt at random intervals.
Craft the Mount Crumpit backdrop using black poster board cut into a jagged mountain silhouette. Paint it with gray highlights to add depth. Position your Grinch holiday lights along the mountain's winding path, using mini LED string lights in green to represent the Grinch's journey. Add miniature bottle brush trees dusted with artificial snow, and create a small cave near the peak using black felt. Finish with a sprinkle of iridescent glitter snow and tiny wrapped presents tumbling down the mountainside.
Grinch Lawn Decorations

Bring your lawn to life with oversized Grinch-themed decorations that'll catch every neighbor's eye. Create a striking display by building a wooden Grinch cutout, painted in his signature green, and position it near your front walkway. You'll need weatherproof plywood, exterior paint, and LED spotlights for nighttime visibility.
Add personality with DIY Grinch lawn signs featuring famous quotes like "Maybe Christmas doesn't come from a store" or "4,000 feet up! Up the side of Mt. Crumpit." For maximum impact, construct a budget-friendly Grinch sleigh decoration using PVC pipes, fabric, and foam board. Paint it red and load it with wrapped "stolen" presents. Secure all decorations firmly with ground stakes and guide wires to withstand winter weather. Position your display where it's visible from the street for best effect.
Santa Grinch Gift Sack

The iconic red sack needs to perfectly capture the Grinch's mischievous Christmas Eve heist. Create your oversized Santa Grinch sack using a red velvet fabric remnant or repurposed curtain material that's approximately 4×6 feet. Fold the fabric in half and sew the sides, leaving the top open. For authenticity, stuff the bottom with newspaper to create a rounded base that'll stand on its own.
Add Grinch-inspired gifts by wrapping empty boxes in Who-ville style papers using whimsical patterns and crooked angles. Apply festive wrapping techniques like twisted ribbons and asymmetrical bows in green and red. Attach a handmade tag reading "stolen from Who-ville" using twine. Position your oversized sack near your Christmas tree or fireplace, letting some wrapped presents spill out for dramatic effect.
Who-ville Mailbox Cover

Transform your ordinary mailbox into a whimsical Who-ville creation using weather-resistant felt fabric in vibrant holiday colors. Cut green, red, and white felt pieces to fit your mailbox's dimensions, leaving an extra inch on each side for secure attachment. Use waterproof adhesive to layer the pieces, creating curvy, asymmetrical patterns typical of Who-ville architecture.
Add playful details like striped candy cane posts, felt snowflakes, and curly ribbon accents to make your Grinch mailbox stand out. Don't forget to leave the mailbox door accessible for festive mail delivery. Secure all elements with weather-resistant hot glue and reinforce edges with clear silicone caulk. For extra durability, spray the entire cover with waterproof fabric protector. Your mailman will smile at this cheerful addition to your Grinchmas display.
Green Christmas Light Display
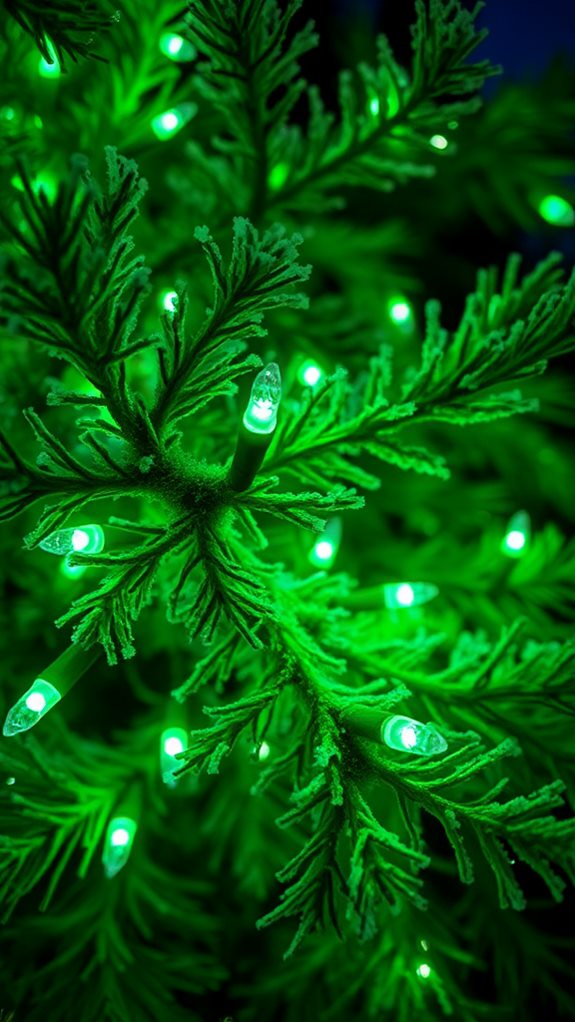
Creating a Grinch-themed light display starts with selecting green LED string lights in various lengths and brightness levels. You'll need approximately 100 lights per tree or large bush for ideal coverage. Choose weatherproof lights rated for outdoor use to guarantee durability throughout the season.
For effective green light placement, start at the base of each element and work upward in a spiral pattern. Secure lights every 6-8 inches using weatherproof clips or zip ties. Create depth by varying the density of lights – cluster them tighter near focal points and spread them out in secondary areas. Key festive lighting tips include: using timers to control operating hours, testing all strands before installation, and maintaining consistent spacing between rows. Consider adding a few warm white lights in strategic spots to create contrast and prevent the display from appearing too monochromatic.
Grinch Cookie Jar
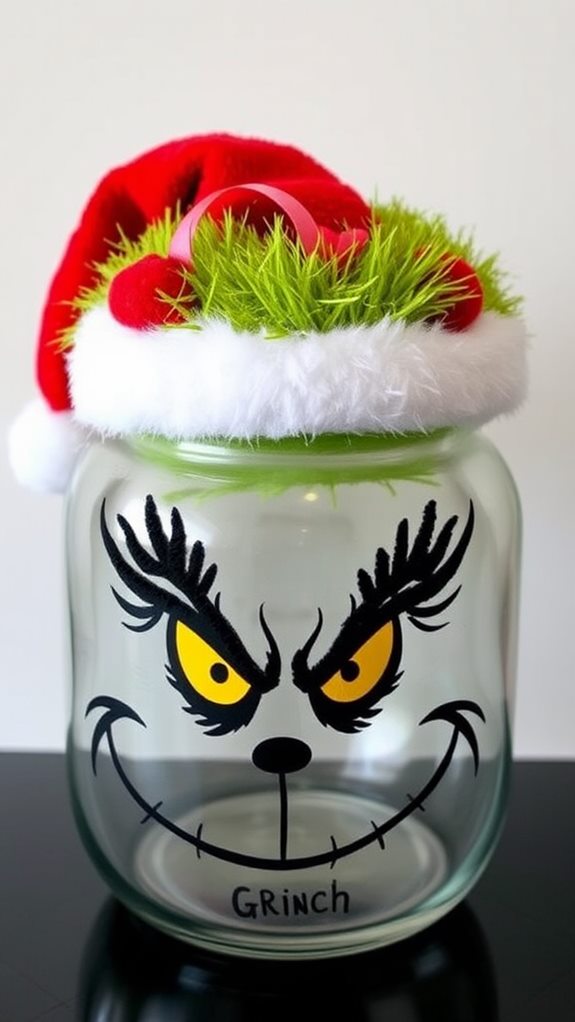
Moving from outdoor displays to indoor decor, you'll find a Grinch cookie jar makes a whimsical addition to your holiday kitchen setup. Transform a clear glass cookie jar using permanent green paint on the outside, and add black vinyl details for the Grinch's signature smirk and furrowed brows. Seal the design with a clear protective coating to guarantee durability.
Fill your jar with Grinch cookie flavors like mint chocolate chip, green macarons, or classic sugar cookies decorated with red hearts. For best Grinch baking tips, use gel food coloring to achieve that perfect Grinch-green shade without affecting your cookie texture. Store your treats in parchment paper layers inside the jar to prevent sticking, and add a red ribbon around the lid for that finishing Who-ville touch.
Who-ville Stair Decorations

While staircases often get overlooked during holiday decorating, you'll find they're perfect for capturing Who-ville's whimsical charm. Transform your Who-ville staircase by wrapping colorful Grinchy garlands around the banister, mixing red and white striped ribbons with oversized ornaments in pink, purple, and lime green. Add battery-operated twinkle lights for extra sparkle.
Create crooked candy canes from PVC pipes, spray paint them in bright colors, and secure them to your stair posts. Hang mismatched stockings in various sizes along the railing, and attach foam snowflakes painted in neon shades. Don't forget to include handmade Who-ville signs with quirky lettering pointing in different directions. For extra whimsy, weave tinsel garlands with curled ribbon between the balusters.
Christmas Card Display Stand
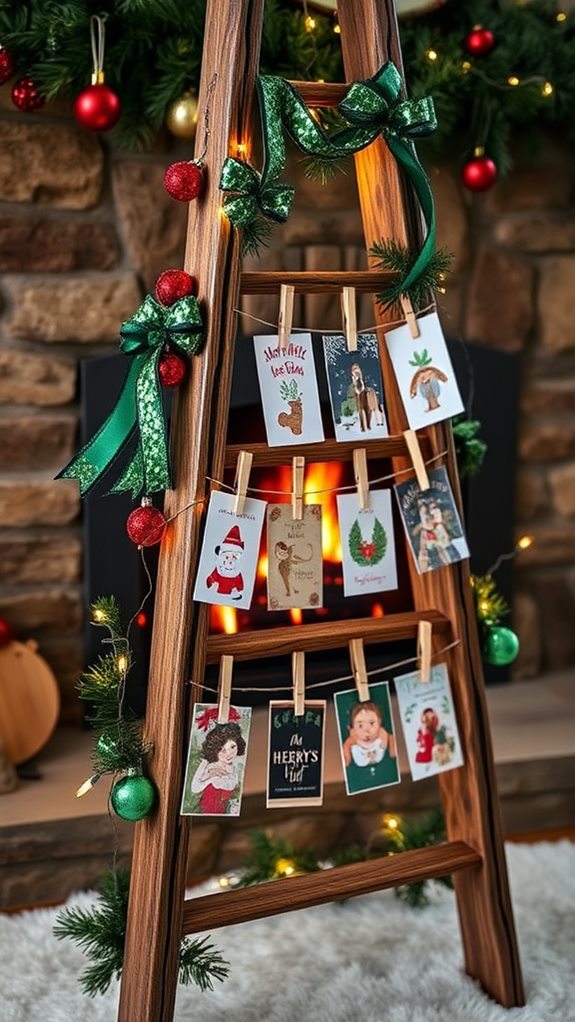
A quirky Christmas card display stand captures the spirit of Who-ville while keeping your holiday greetings organized and visible. Create this whimsical piece using a wooden base, bendable copper wire, and colorful clothespins.
Start by drilling small holes in a 12×8 inch wooden base at various angles. Insert lengths of copper wire, bending them into crooked, Who-ville-inspired shapes. Spray paint the wires in bright colors like pink, lime green, and turquoise. Once dry, attach miniature clothespins along the wires using hot glue.
For extra Grinch-themed flair, decorate your card display ideas with small ornaments and tinsel. Add green fur trim around the base's edges, and paint whimsical swirls on the wood. These festive card holders can showcase up to 20 cards while serving as a playful centerpiece for your Grinchmas décor.
Green Feather Garland

To match the whimsy of your card display stand, create a lush green feather garland that captures the Grinch's signature fur. You'll need green craft feathers, green yarn, and a sturdy string or twine as your base.
Start by laying out your string and measuring your desired garland length. Tie small bundles of feathers together using the green yarn, overlapping them slightly to create fuller green feather textures. Attach these bundles to your base string every 2-3 inches. For garland crafting tips that'll save you money, mix shorter feathers with longer ones to add depth while using fewer materials. Fluff and adjust the feathers as you go, ensuring they're secure and facing the same direction. Don't forget to leave loops at each end for easy hanging.
Whoville Letter Signs

Creating whimsical Whoville letter signs lets you add storybook charm to any wall or entryway. For this Grinch sign inspiration project, you'll need foam board, acrylic paint, scissors, and a pencil.
Start by sketching curved, wavy letters that spell out classic Whoville phrases like "Welcome to Whoville" or "Merry Grinchmas." Cut the letters from foam board, ensuring each one has its own quirky, bent shape. Your Whoville letter crafting gets creative as you paint each character in festive colors – try mixing bright pinks, blues, and yellows.
Add dimension by outlining letters with a contrasting color. Mount your finished pieces on a wall using removable adhesive strips. For extra flair, attach small ornaments or tinsel to the corners of each letter, creating that signature Dr. Seuss whimsy.
Grinch Holiday Welcome Mat
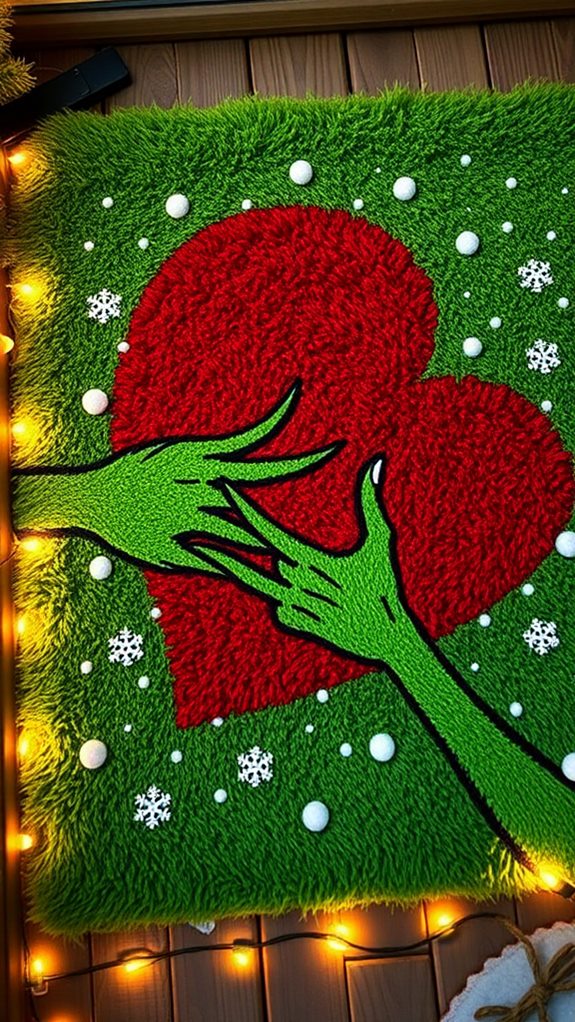
Spray the mat with clear sealant before painting to help the colors adhere better. Apply your design using dabbing motions with a stiff brush, ensuring even coverage. Add festive welcome signs with small details like candy canes or Christmas ornaments in the corners. Once dry, spray with weather-resistant sealant to protect your design through the holiday season. Total cost: under $25 using basic craft supplies.
Christmas Roast Beast Platter

While your outdoor decor welcomes guests with Grinchy charm, the dining table deserves its own whimsical centerpiece. Create a show-stopping Christmas Roast Beast platter that'll make hearts grow three sizes with these budget-friendly steps.
Start with a large silver or gold serving tray as your base. For roast preparation, arrange artificial greenery around the edges, mixing pine sprigs with small red berries. Position a faux roast (made from painted foam) in the center, adorned with a large red bow. For festive plating, add battery-operated twinkle lights beneath the greenery for a magical glow. Complete the display with mini Who-ville inspired decorations like tiny houses, curved utensils, and hand-lettered recipe cards featuring classic quotes from the story. You'll have a centerpiece that's both playful and practical.
Conclusion
Transform your home into a whimsical Who-ville wonderland with these budget-friendly Grinch-themed DIY projects. You'll save money by upcycling mason jars, crafting your own wreaths, and creating custom decorations using basic craft supplies. Whether you're making a festive welcome mat or assembling a miniature village, each project's step-by-step instructions guarantee you'll create professional-looking decorations that'll bring Dr. Seuss's magical world to life this holiday season.

